 |
|
Setting Up The MEATER 2 Plus
Setting up the MEATER 2 Plus when you first get it is as simple as tapping on buttons over and over:
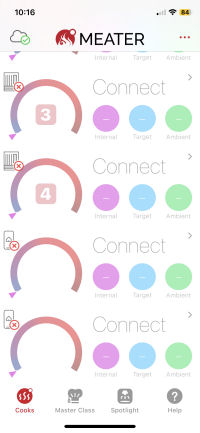 When you first start the app, any devices you already have installed will show up, but not the MEATER 2 Plus probe. |
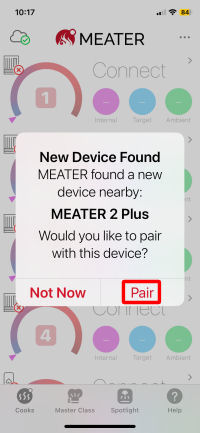 When you remove the probe from the charger, the app will tell you that a new device was found. Tap on "Pair". |
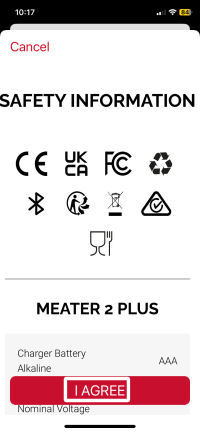 Next you have to agree to some safety information. Tap on "I AGREE". |
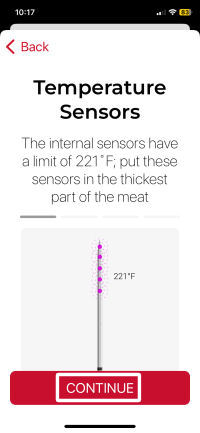 Next you are presented with some information about the food sensors. Tap on "CONTINUE". |
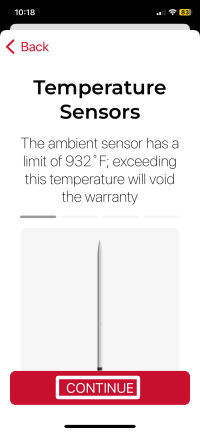 Next you are presented with information about the ambient sensor. Tap on "CONTINUE". |
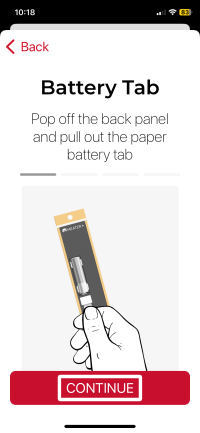 Now you are instructed to remove the plastic tab from the battery compartment and turn the repeater/charger on. Tap on "CONTINUE". |
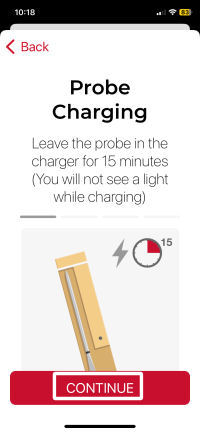 You are told to let the probe charge for 15 minutes. Tap on "CONTINUE". |
 You are told that WiFi Permission is required. Tap on "CONTINUE". |
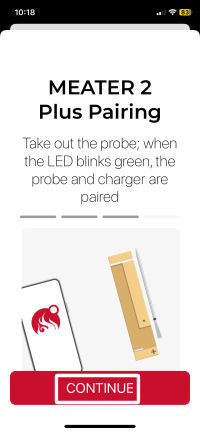 Remove the probe from the charger/repeater and the two will pair. Tap on "CONTINUE". |
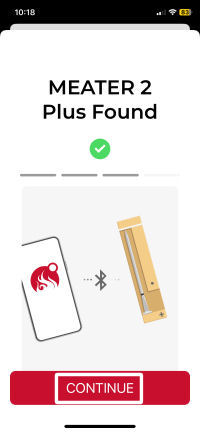 This screen indicates that the pairing was successful. Tap on "CONTINUE". |
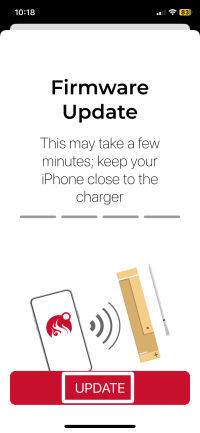 Your probe and charger/repeater may well need a firmware update. If you see this screen, tap on "UPDATE". |
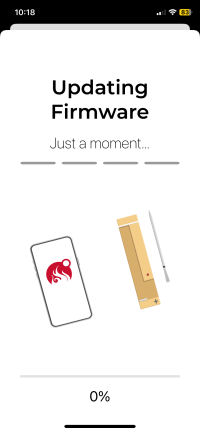 Firmware updating will prepare to start. Just watch. |
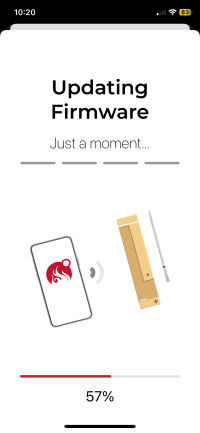 The update will proceed. Keep watching. It will take a few minutes. |
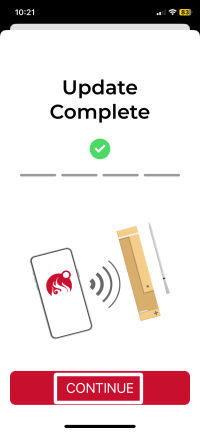 Finally you are told that the update is complete. Tap on "CONTINUE". |
 Initial setup is complete. Tap on "LET'S GET STARTED". |
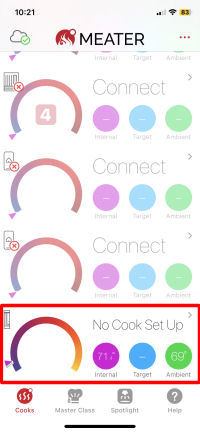 You are taken back to the home screen that shows all the devices, now with the MEATER 2 Plus probe added. |
Bluetooth Range
One critical aspect of any wireless probe like the MEATER 2 Plus is the range of the Bluetooth communications.
What good is a wire-free thermometer if you can't stray more
than a few feet from your cooker before losing your connection? And of course we all know that probably
the biggest complaint from users of the original MEATER products is losing connection.
So, it's no surprise that one of the bigger improvements to the MEATER 2 Plus is the use of
Bluetooth 5.2 Coded PHY Long Range communications which can achieve connections over 1 kilometer.
The first thing we tested was the range of the probe's Bluetooth signal in a large number of environments. This shouldn't be terribly important with the MEATER 2 Plus since you are supposed to place the repeater/charger as close to the probe as possible. However, we thought this might be useful information for you.
To test the Bluetooth range of the probe, we placed the probe in its test position and then measured the range by measuring the distance at which the repeater/charger lost the connection and started blinking red. Here are the results:
| The best case is just a straight line of sight between the probe in the vertical position and the repeater. | 486 feet |
| Inside a large Big Green Egg ceramic cooker. Due to the placement of our cooker and the geography of our deck, we could only get 39 feet away from the probe. | 39+ feet |
| What about a metal cooker? This, of course, depends on the construction of your metal cooker. We used a Weber Smokey Joe with both vents closed. | 36 feet |
| Inside a large Big Green Egg cooker, measured from inside the house through a sliding glass door. | 70 feet |
| Inside a Bosch electric oven with the door closed. Due to the geography of our kitchen, we can only get 28 feet from the door. | 28+ feet |
| Inside a Panasonic microwave oven with the door
|
30 feet |
| Inside a Bosch Speed Oven (combination microwave and convection oven) with the door
|
10 feet |
| Inside a cast iron Dutch oven with lid. | 11 feet |
| Inside an All-Clad sauce pan with lid. | 35 feet |
| Wrapped inside two layers of heavy duty aluminum foil. | 9 feet |
| Inside aluminum tray with one layer of aluminum foil covering. | 32 feet |
|
|
So all in all, the Bluetooth range of the MEATER 2 Plus probe itself is quite impressive. But like we said, that is really not all that important since you really should be keeping the MEATER 2 Plus repeater/charger as close to your cooker as possible. Then, all you need worry about is the Bluetooth range of the repeater. So let's take a look at that.
First of all, MEATER claims an unobstructed line of sight range of up to 2,500 feet for the repeater. That's almost half a mile! We placed the repeater on our front porch and then walked down the street as far as we could before the street turns and we no longer had a line of sight path. At this point, we still had a connection and the distance was 840 feet. Even THAT is impressive!
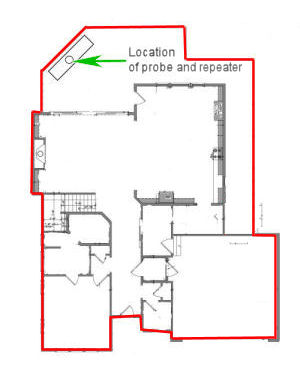
But the important thing is how far can you connect to the repeater when you are in your yard, or inside your house? Because you are now placing things like walls, windows, pipes, wires, etc. between you and the repeater, the range is going to be significantly reduced. So we placed the probe in our large Big Green Egg cooker with the repeater right next to it. We then walked around the house to see where we could maintain a connection. Below is a diagram of our house showing the results on the first and second floors.
Bluetooth connection on the first floor inside red line. |
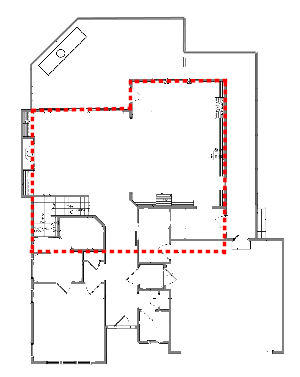
Bluetooth connection on the second floor inside dashed red line. |
So we could see the probe everywhere on the first floor and about the back two-thirds of the second floor. But we can do better. Since the probe itself has quite impressive range, we moved the repeater indoors as shown in the diagram below.
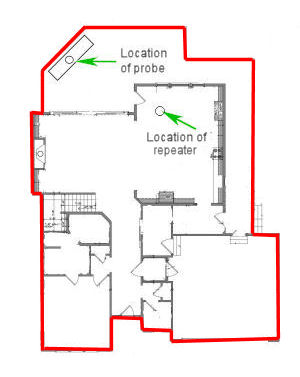
Bluetooth connection on the first floor inside red line with repeater indoors. |

Bluetooth connection on the second floor inside dashed red line with repeater indoors. |
Now with the repeater indoors, we could maintain a connection everywhere in the house, both first and second floors. And oh by the way, we could also maintain a connection up on the third floor attic as well.
So the MEATER 2 Plus certainly has much more range than the original MEATER and MEATER+ products. You should be able to maintain a connection everywhere in your house and yard, and if necesssary you can relocate the repeater and gain extra coverage inside.
 |
NUGGET ALERT: The Bluetooth signal radiates most strongly out the sides of the probe. So one way to improve the Bluetooth range of the probe is to place it sticking out of the meat vertically if possible. |
|
NUGGET ALERT: While this should be obvious, we'll point it out anyway. Bluetooth communications are backward compatible, meaning that the MEATER 2 Plus repeater can communicate with older smart devices that only support Bluetooth 4. However, you won't be able to achieve longer distances unless your smart device supports Bluetooth 5. |
New Temperature Readouts
The original MEATER probes only showed temperatures to the nearest degree. Now with the new probe and App,
the internal temperatures for the MEATER 2 Plus probe are shown to the nearest 0.1°F.
The ambient temperature is still only shown to the nearest degree. And of course, this doesn't apply to
the original MEATER probes.
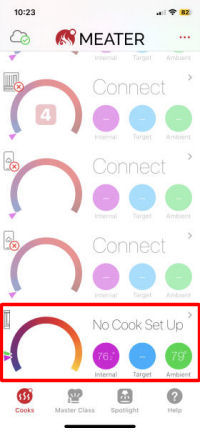
If you tap on the entry for any probe, you will be taken to a display that has all the information for that probe. |
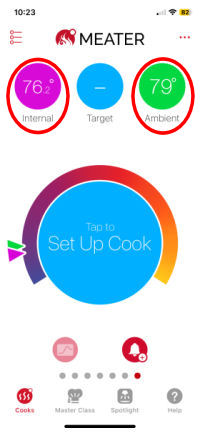
If you tap on either the internal or ambient temperature reading, a more detailed block will appear at the bottom of the screen showing temmperatures for all the sensors. |
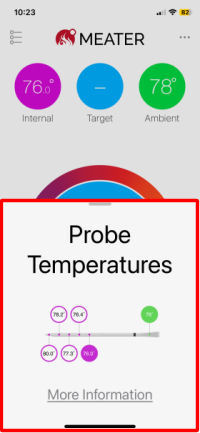
Here you can see the temperatures for the individual internal sensors to the nearest 0.1°F. Notice that the ambient temperature is still only to the nearest degree. |
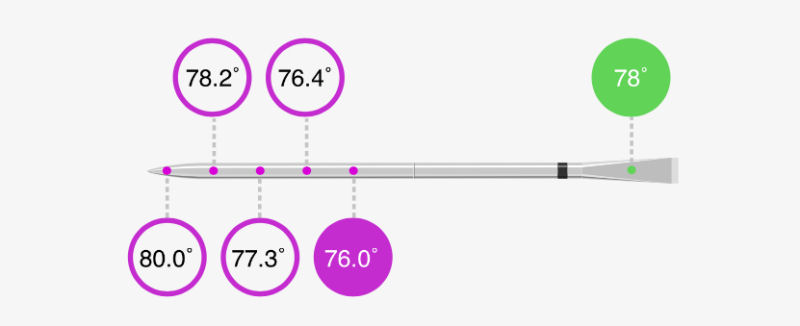
Here we have enlarged the temperature readouts.
New LED Behavior
The LED on the MEATER 2 Plus charger/repeater behaves differently than on the MEATER and MEATER+ original
chargers. First of all, there isn't a button to press to check on the state of the battery. So how do
you check?
Remove the probe from the charger:
When you put the probe back into the charger:
NUGGET ALERT: If the LED doesn't light up at all when you remove the probe from the charger, then the probe will not turn on (assuming it has some charge). When you replace the battery in the charger, it won't see the probe since the probe is off. You must then insert the probe back into the charger and remove it in order to turn the probe on.
NUGGET ALERT: When the charger/repeater loses or regains connection, it does so rather quickly. This means you can use the light on the charger/repeater to check out the range of your probe in your particular environment. Just walk around noting when the LED goes from green to red or vice versa.
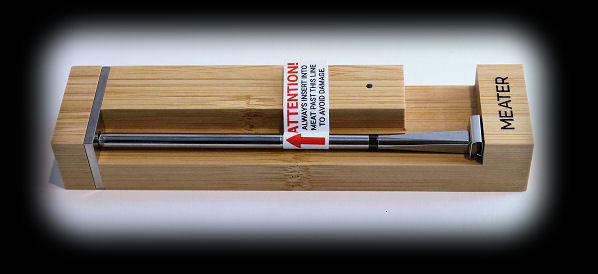
Thermometer Accuracy
The MEATER 2 Plus probe contains six temperature sensors, five food/internal sensors and one ambient sensor. The internal sensors are
located in the lower third of the probe. The ambient (or pit) sensor is located in the handle of the probe,
above the black ceramic ring. We asked what type of sensors were used (thermistor? thermocouple? platinum RTD?) but
the only answer we could get was that "MEATER uses a precision calibrated digital sensor for the probe's internal
temperature." In any event, we wanted to test the probe for accuracy of its meat sensors and its ambient sensors.
Meat Sensors: With previous MEATER probes, the temperature limit on the meat sensor was 212°F which meant you couldn't do the boiling water test to check their accuracy. You got a warning screen and couldn't see the temperature being recorded. However, now the temperature limit on the meat sensors is 221°F which means we can indeed do the boiling water test. But we have to keep in mind that the MEATER App is going to report the lowest of the five sensor readings and we have to look at the detailed view which shows all five readings.
We determined the boiling point of water to be 211.9°F using a boiling point calculator and verified it using a Thermapen One thermometer. The five sensors gave surprisingly high values:
| Sensor # | Reading |
|---|---|
| 1 | 214.1°F |
| 2 | 214.1°F |
| 3 | 214.1°F |
| 4 | 214.2°F |
| 5 | 214.6°F |
Obviously, it would be worth your time to do the boiling water test and see how far off your sensors are. You will then have to mentally make adjustments when you are cooking, as there is no provision with the MEATER 2 Plus probe to calibrate the sensors.
Ambient Sensor: We also checked the accuracy of the ambient sensor in boiling water by holding the probe upside down and immersing only the handle. What we found was indeed puzzling. The value being reported was rapidly changing and varying from 208°F to 217°F. Clearly, not very good performance. However, the ambient sensor on the original MEATER probes has always given people fits and requires some explanation.
Reading the FAQ on the MEATER web site, one of the longest answers we came across was trying to explain the behavior of the ambient sensor. It mentions things like a bubble of cool air that exists near the surface of the cold meat. It mentions that you mustn't insert your probe too deeply into the meat lest the ambient sensor be too close to the cold meat. It goes on to mention other things that could affect the temperature reading: the roasting pan, using a glass container, the proximity of the ambient sensor to the walls of the cooker, the �cold� spots of the oven, the size of the roast, etc. MEATER claims that this is a better way of measuring the temperature of your cooker since it is measuring the temperature of the air near the meat. Our feeling is that the ambient sensor is of little use for measuring the temperature of your cooker due to the many variables which can influence the ambient sensor. You definitely would not want to try to get your cooker stabilized at any particular temperature using the MEATER's ambient sensor.
However, the ambient sensor is not totally useless by any means. If you dig into the Apption Labs patent application and look at paragraph 46:
"As noted above, more accurate predictions on completion time and resting temperature rise can ordinarily be made by utilizing dual-sensor technology. Using an ambient or external thermal sensor in or near the third portion 102 can enhance estimation of heat input at the location of the food 108, which can vary when the food 108 is moved, turned, or when changes in cooking environment occur, such as opening the hood of a BBQ, adjusting heat on a gas grill, or charcoal fuel losing heat. The heat input at the location of the food 108 can be estimated more accurately using an ambient or external thermal sensor adjacent an exterior surface of the food 108 and measuring the ambient temperature over a period of time."In other words, you can better estimate the completion time of your cook, if you know the temperature of the air immediately adjacent to the meat you are cooking. As we saw, the MEATER app was able to give a pretty good estimate when cooking ordinary foods, and even for foods with temperature stalls once the food exited the stall. So we would just ignore the ambient sensor's reading and let the MEATER Probe use it for its own purposes.
|
NUGGET ALERT: The purpose of the ambient sensor, as we have explained, is to give the App information about the air temperature near the surface of your meat. Therefore the ambient sensor will report the most accurate temperature if the probe is inserted into the meat up to the ceramic ring, thus placing the ambient sensor as close to the meat as possible. |
You can support this website by shopping at The Naked Whiz Website Store and Amazon.com
|

