Introduction
We thought we'd pass on our first impressions of the new ProCom4 Wireless BBQ Guru which comes to us from The BBQ Guru folks at www.thebbqguru.com. The wireless Guru is very impressive. While looking through the manual and playing around with the wireless Guru, we kept on thinking "wouldn't it be great if it did this..." Every time we said that, we poked around and discovered that it did indeed do whatever it was we were pondering. Shot Gun Fred and his team have done a great job in loading this unit up with useful features (in no particular order):
- Handy stands to hold the base station and the pendant units.
- Three "main menu" screens that you can have the pendant display as a default.
- A count-down timer that will either sound the alarm or shut the unit down.
- A back light on the pendant display for night time use.
- Four channels, meaning you can monitor four different temperatures at the same time.
- Four probes come with the unit.
- Subscriber wireless system which means nobody else's unit can interfere with yours.
- 600 foot range.
- The good-neighbor function allowing you to silence alarms.
- Ramp mode which allows the unit to lower the pit temperature as the meat temperature approaches your target.
- For the "advance" user, the ability to alter parameters like how long the cycle time of the unit should be, or how far from your target any temperature should get before the alarm goes off.
- Battery life indicator which displays the life remaining to nearest percentage.
- Indication when the fan is on.
- Indication of the percentage of time that the fan is blowing.
- Temperature displays in degrees F or C.
- 32 to 400 degree F range with +/- 2 degrees F accuracy.
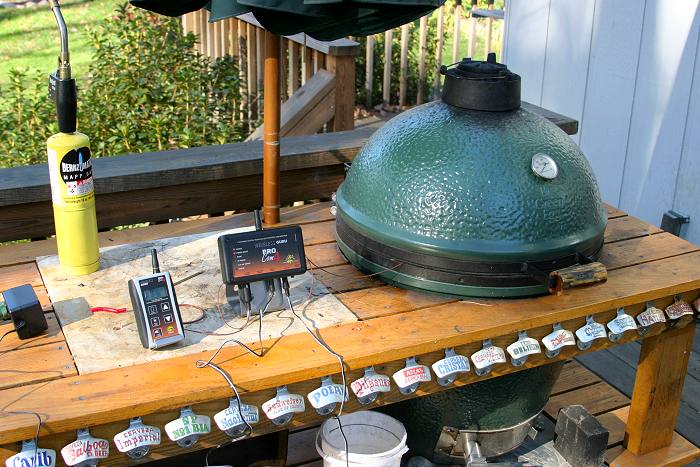
If you aren't familiar with the BBQ Guru, it is a temperature controller for barbecue pits. It monitors the pit temperature and controls airflow through the pit so as to keep the pit temperature where you want it. It does this through the use of a fan which attaches to the pit. By turning the fan on and off as required, the BBQ Guru can keep your pit at a set temperature as long as there is fuel to keep the fire going.
The original BBQ Guru Competitor model had all of its controls and displays on the base station. The new ProCom4 model puts all the control and display functions in a seperate hand-held unit called a "pendant." Now you can take the control unit with you up to 600 feet away from the base station to monitor and control your cooker.
Here's what comes in the box:
- The hand-held pendant, with batteries installed
- The base station, with battery installed
- Two sets of probes
- A metal stand for the base station. (Shot Gun Fred is working on a stand for the pendant.)
- A bag of those plastic squiggly worm things to keep your cables under control
- Flow chart of operation, and a new user's orientation guide.
- High temperature foil tape to cover inlet dampers
- Red abrasive pad to clean probes
- Kill plug
The only other things you need to order with your unit are a fan and adapter for your particular cooker. We recommend the 10 CFM Pit Viper fan since it is only a few dollars more than the 4 CFM Pit Runner.
So, how does this unit compare to the competitor? Well, one really neat improvement is the digital display of the various temperatures. On the Competitor with its LED segment display, you only know the temperature to within 25 degrees. Now you have the ability to see a more accurate indication of the temperature.
Another little benefit is that you now can monitor four temperatures. In addition to the pit temperature and the meat temperature, maybe you need to monitor the outside temperature? Or the temperature inside your beer cooler? The unit comes with two sets of probes. Each set contains one pit probe and one meat probe. Shot Gun Fred has said he can make probe sets with two pit probes or two meat probes as a customer order, and at a slightly higher price. Note that the two extra probes can be monitored by you by looking at the pendant display. However, only the pit and meat probes are actually used to control the temperature of the cooker.
Of course, with all these settings and features, it might get a little confusing about which button to push. Shot Gun Fred takes care of that. He has produced a flow chart of all the functions on the pendant. This flow chart is downloadable from the BBQ Guru web site if you lose the one included with the ProCom4.
Incidentally, another potential source of confusion might arise if you are lucky enough to own multiple ProCom4 units. Which pendant goes with which base station? You might think that you can play around with turning them off and seeing which one loses contact, etc. but the serial number of each unit is printed on the label on the back. So the matching base station and pendant will both have the same serial number labeled on them.
Speaking of owning multiple units, what about if you take your ProCom4 to that big barbecue cookoff and find that everybody and their uncle has a ProCom4. Nope, there is no problem. Since every unit has a unique serial number, the pendant will only talk to its own base station. Nice!
The Hand Held "Pendant"
 This is a photo of the pendant. This is the unit where you select all of your settings. It runs off of two AA batteries. You can use alkaline, lithium or rechargeable batteries. As you can see, it has a two-line display and six buttons:
- The SCROLL button for moving through the menus
- The BACK LIGHT button for turning on the back lighting on the display
- The ALARM SILENCE button for turning off alarms
- The UP and DOWN arrow buttons for selecting options
- The POWER button.
|
The Base Unit"
 This is a photo of the base station. The base station has six LED indicators:
- POWER, indicates that the unit is operating on of the external power and run the fan.
- POWER DRAFT, indicates the fan is running.
- RAMP, indicates that Ramp Mode is turned on.
- IN RANGE, indicates that the unit is communicating with the pendant.
- OUT OF RANGE, indicates that unit is not communicating with the pendant.
- ERROR, an error indication exists.
Along the lower edge of the unit, you can see that there are plugs for two sets of temperature probes, the power supply and the fan. On the right side of the bottom edge is the power switch.
This unit runs off of a 9 volt battery which can be replaced by removing the four screws that you see in the photo and removing the cover.
Note that the base station is where the values selected by the pendant are kept. So, if you turn off the pendant, or the pendant is taken out of range, the base station will continue operating using the settings that you have specified. Nice!
The Home Screen
The following three screenshots show the displays that you can have for your default display:


The three screens you can have for your default display.
The display on the left just shows you the pit and meat temperatures. An asterisk displays next to "PIT" when the fan is running.
The display in the middle is known as Shot Gun Fred's Screen. As you can see, it displays the pit and meat temperatures, the current value in the timer, and an indication of the percentage of time that the fan is blowing. The "2" indicates the fan is on for 20% of the cycle. An asterisk also displays on this screen in front of the "2" when the fan is blowing. And finally on the right is the display which shows you the meat and pit temperatures as well as the target temperatures for the pit and the meat. There is no fan indication on this screen.
Common Options Screens
The unit has two sets of menus. The second set is for specifying options that are beyond the scope of this review. In fact, we doubt you will ever need to mess with them as they are operating parameters that probably don't need to be changed. The first set of menus, however, are the ones that a typical user needs to operate their ProCom4:

This is the initial power-on screen. It displays the level of the software in the pendant as well as
the serial number of your unit. This unit is serial number 4.

Once the unit displays the "home screen", you can then press the scroll key to move through all the options. The first option is this screen which displays the values of the temperature being measured by the two auxiliary probes. In this case, there was no second set of probes plugged in so the unit shows the temperature as "over limit". This is also a sign of a failing probe if you should have probes connected to the base unit.

Press the scroll key again and you now can set the target temperature for your cooker. Pressing the up and down arrow keys will raise and lower the value for this setting.

The next option is to set the target meat temperature. Again, pressing the up and down arrows will raise or lower the meat temperature setting.

Scroll again and you reach the timer setting screen. Here you can set a timer value from 1 minute up to 99 hours, 59 minutes. The timer will start once you leave this screen. The next option determines what happens when the timer reaches 00:00.

This option determines what happens if the timer goes off. You have the choice of having the unit do nothing, sound the audible alarm, or shutting the unit down.

The next option tells the unit whether or not to sound the audible alarm when the timer goes off (and you have selected the option to have the alarm go off) or when various alarms occur like temperatures that are too high or too low, or the unit loses contact with the base station, etc.

This option turns Ramp Mode on and off. On the Competitor, you had to set Ramp Mode by dialing in a meat temperature before you turned the unit on. Now you can turn it on and off by setting the option directly.

The last screen that you can scroll through is the battery indicator. Nice, eh? Now you know exactly how much power you have left in the pendant's battery.
How Far Can You Go? Unit Range
But you really want to know how far it really works, right? You've probably had some sort of wireless appliance that boasted a range in the hundreds of feet, and found that you were lucky to get half that range, right? Well, we took our pendant for a little walk. We don't have a 600 foot line of sight from our cooker without climbing on our neighbor's roof, so we just started down the street. At about 400 feet along this path, we lost our line of sight because the street curves and there was now a house between us and the cooker. We made it 531 feet from the cooker, with a house between us and the cooker, before the signal was lost. Pretty impressive.
Here's a visual aid to help you. These photos were taken approximately 400 feet from the cooker, which obviously is quite a bit closer than where we finally lost the signal:

Summary
So, what could Shot Gun Fred have done to make this better? We've had our unit now for about 3 days and we finally came up with something. How about a "Page" function so that you can find the pendant when you set it down somewhere and wander off? Don't ask me why I might suggest this feature might be necessary....
UPDATE: Well, wouldn't you know it. Right after I wrote that, Shot Gun Fred called me up to let me know that this nifty feature already exists. Well, sort of. If you lose your pendant, and if you have alarms enabled on your pendant, all you have to do is turn off your base station. Your pendant will then sound its audible alarm to let you know that it has lost contact with the base station. Voila! Go find the beeping pendant and you are back in business.
All in all, this is a great new addition to the BBQ world. Of course, it does cost quite a bit of money. However, if you are wondering why it is so expensive, you should realize this is a Cadillac, not a Ford. These are quality components that are packed with loads of features. Not everyone will think the wireless features and added control is useful to them or worth the money to them. But if you need or want a wireless unit for your barbecueing that has both monitoring and control functions, this is a winner.
NEW VIDEO!! Those of you who know Uncle Phil from the Big Green Egg forum know what great videos he can produce. Here is a link to a video he made showing how to use the ProComm4:
Uncle Phil's Video On Using The ProComm4
| 

