Before we begin, we need to thank Egret from the Big Green Egg Forum for posting his method of smoking cheese and teaching us how to do it. Egret learned it from Old Dave, also a poster at the Big Green Egg Forum, who really introduced this technique to most of us. So, thanks go to Old Dave and Egret.
Next, before you even think about using this procedure to smoke cheese, you need to read this warning! After you remove the cheese from the cooker, you might be temped to place it in your refrigerator to firm it back up. Don't. If you do, your refrigerator, in less than an hour, will smell like the inside of one of those machines they use to make liquid smoke. You have been warned!
Materials and Ingredients
You will need the following items:
- Cheese (see below)
- 6 briquettes
- Smoking wood chunks
- Hammer and chisel
- Plate setter
- Grid
- Raised Grid
- Disposable aluminum foil pan, 13x9 or so
- Ice
First, We Need Some Cheese
You can pretty much smoke any cheese that is hard enough to maintain its shape when subjected to a little heat. For this tutorial, we have choses to smoke some Muenster, Swiss, Pepper Jack and Cheddar cheeses. You can cut them into appropriately size blocks, and keep them in the refrigerator until you are ready to smoke them so that they stay cold.
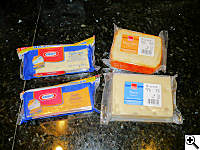
Four blocks of cheese for smoking
|
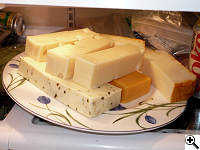
The cheese cut into blocks and kept in the refrigerator
|
Next, We Need Some Smoking Wood
We are using apple smoking wood that has been split into thin chips about the size that will cover a briquette:
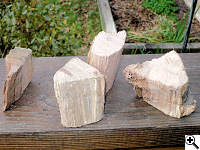
Typical chunks of apple smoking wood before we split them into chips
|
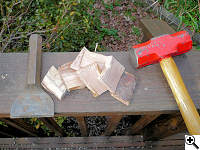
Using a hammer and chisel, we split the chunks into flat chips
|
And We Need Some Burning Charcoal
The charcoal we are going to use is briquettes. We prefer to use a natural briquette like Royal Oak or Wicked Good Charcoal Weekend Warrior briquettes. These briquettes contain only charred wood and a vegetable binder. If you are forced to use Kingsford, of course, be sure to burn off the surface chemicals before you add your cheese to the cooker. Why briquettes? Well, briquettes burn slowly and evenly which is exactly what we want for this type of smoking. We want just enough heat to make our smoking wood generate smoke, and no more.
We will be using 6 briquettes, so we placed 8 briquettes in a chimney starter and then fed about 4 sheets of newspaper to the chimney, one after the other, until the briquettes were started. We let them burn a bit in the chimney until they were pretty much ashed over. You can also start the briquettes with a MAPP torch or any other way you wish.
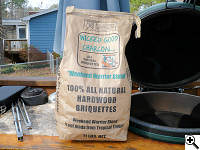
Wicked Good Charcoal briquettes are perfect for this task
|
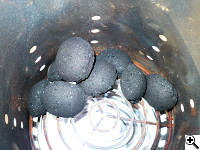
8 briquettes in the chimney ready for starting
|
Let's Put It All Together
If you have all your stuff ready, it's time to smoke some cheese. Here is how we assembled the setup:
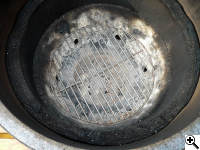
We used a Weber charcoal grate for a small cooker as our grate. You can use the BGE cast iron grate also.
|
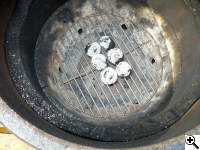
First we lined up 6 briquettes in two rows of three briquettes
|
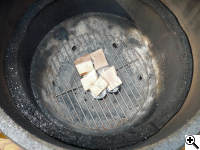
Next we balance wood chips on top of the briquettes
|
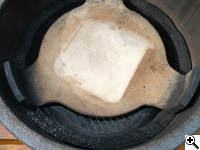
Next comes the plate setter, legs up
|
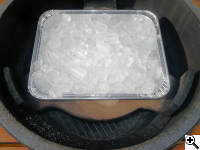
Next we placed the disposable aluminum foil pan full of ice on the plate setter
|
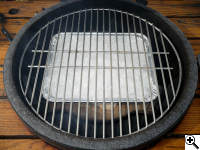
The regular grid goes on the plate setter legs
|
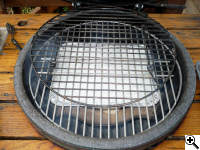
The raised grid clips onto the regular grid
|
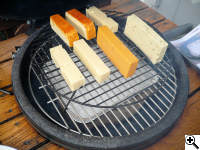
Finally the cheese goes on top of the raised grid. You should probably wait for the initial burst of smoke to die down first
|
Note the position of your dome thermometer when you place the cheese on the raised grid. You can easily put the probe into a block of cheese. You can always remove the dome thermometer since you won't really be using it to monitor the temperature of the cooker.
The Cheese Is In The Smoker, Now What?
Good question! Now you want to keep the temperature of your cooker below 100 degrees. When we smoked our cheese, the outside air temp was between 55 and 60 degrees. Here is a chart of the temperatures in the cooker:
The yellow line is the temperature right at the grate that the cheese was sitting on. The red line is the temperature just inside the daisy wheel metal top. (Ignore the time on the horizontal axis. We are still learning how to use our data recorder. The time span of the graph is just over one hour.) Here is how we set our vents:
What you do now depends on how much smoke you want on your cheese. Regardless of how smokey you want your cheese, we recommend that you wait for the the initial thick smoke to dissipate before putting the cheese into the smoker. That first thick smoke can be bitter and overpowering.
When you remove the cheese from the cooker, you will want to allow it to cool before you try to handle or package it up for storage. Like we said, however, putting it in the refrigerator is a bad idea!


