|
|
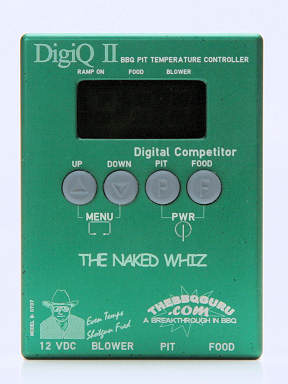
Let's look at the front panel details. In the photo below, you can see that the DigiQ II has a 3 digit display and four buttons:
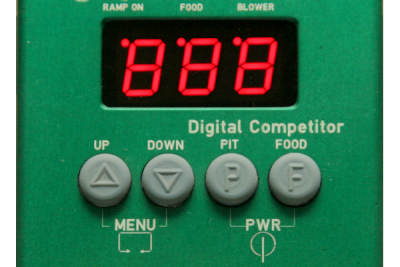 That's it! Press the Pit and Food buttons together to power the unit off and on, and press the Up and Down buttons simultaneously to scroll through the menu. Press the Pit button to display the pit temperature; press the Food button to display the food temperature. Press the Up or Down button to adjust the set point for the temperature currently displayed, food or pit. It's pretty simple! Also, see the three dots, one at the top of each digit? As you should be able to tell from the labels, the left dot is on when Ramp Mode is on. The middle dot is on when the display is showing food temperature (and off when displaying the pit temperature), and the right dot blinks to show when the blower is running. (Also the temperature display alternates between bright and dim to indicate the percentage of time that the blower is running.) The following photos show the other miscellaneous and displays on the front panel of the DigiQ II system unit:
Here's a brief description of the menu options shown on the displays above: In addition, there are quite a few displays which we can't photograph in which the message scrolls across the display. For example, when the food temperature reaches the target, the word "donE" scrolls on the display. When you select either the pit temperature or the food temperature for display, the words "Pit oF" or "Food oF" scroll on the display. And when you set the pit or food temperature, the words "Pit SEt" or "Food SEt" will scroll. In the following photo we have turned the DigiQ II on its back and show the bottom where the connectors are:
The connector on the left is for power, while the next connector to the right is for the blower. You can either use the supplied "brick" power supply or you can purchase an optional cigarette lighter power cord that you can then plug into one of the many automobile starter batteries available which have a cigarette lighter outlet on them. There is also a second power cord adapter available with clips on the end for use with a 12V battery when you don't have a cigarette lighter outlet available. The connector second from right is for the pit probe which measures the air temperature in your cooker. This probe provides the input to the DigiQ II that allows it to monitor and control your cooker. Finally, the connector to the far right is for the food probe which is used to monitor the temperature of the food and provide input to the DigiQ II for Ramp Mode. The DigiQ II comes with two temperature probes, each with their own connector:
The probes are made from stainless steel and contain thermocouples. The wires have an armor braid which can withstand temperatures up to 700 degrees. (NOTE!! The Owner's Manual says the probes are good to 1000 degrees. There was a slip of paper in our probe packet that says they are good to 550 degrees. The BBQ Guru web site says they are good to 700 degrees. We have talked to Shotgun Fred and BBQ Bob and they say the probes are good to 700 degrees.) The wires are now 6 feet long, versus the 4-foot wires on the Competitor probes. Be careful not to kink the wires. The probes and the wires should be shielded from direct radiation from a hot fire. Do not let them come into direct contact with flames. If you need to shield the wires, you can place a layer of aluminum foil beneath them, but do not wrap the wires in foil. This can actually make the heat worse and damage the wires. Also, having the pit probe exposed to direct radiant heat can cause it to register a temperature which is higher than the air temperature in the cooker, and thus fool the DigiQ II into cutting back on the fire. If a probe does fail, you will be able to tell because when plugged into the DigiQ II and with no heat applied to the probe, the DigiQ II will show the three dashes in the display indicating a high temperature. You can see in the photos how the each probe is connected to its own plug which plugs into the DigiQ II system unit. You can also see the famous Curl-Eez doo-dads which can be used to keep your wires organized. Since the probes are now on separate plugs, you have the choice of not plugging the food probe into the system unit if you are only going to use the DigiQ II to control your cooker's temperature and not to monitor food temperatures. If you want to do this, make sure you disconnect the food probe before you turn the unit on. This lets the unit know that the food probe is not being used, and this will prevent false alarms related to the food temperature. How accurate are the probes? We tested the two probes in boiling water. According to our calculations, the boiling point of water in our kitchen when we conducted the test was 211.8 degrees. Here were the results:
Hmmmm. Not as close to 212 degrees as we'd like to see. However, this was before we calibrated the unit. And after talking with Shotgun Fred, we discovered that if you want the best accuracy, you need to allow the unit to "warm up" for about 20 minutes before you start looking for accuracy. That's why part of the calibration procedure (see next section) requires you to warm up the unit for 20 minutes before calibration begins. After we went through the calibration procedure we were pleased to see that the probes indicated the proper temperature. We tested the boiling water with our Thermapen and got a reading of between 211 and 212. Here's what we got with the DigiQ II after calibration:
So, if you are going to check the unit/probes for accuracy, make sure you allow the unit to warm up before you make any decision to calibrate or not. And one final word about calibration of the unit. Shotgun Fred indicated that all units get calibrated to a traceable standard before they leave the factory. He didn't know why our unit wasn't spot on to begin with, but of course, we don't know what the unit would have read had we allowed it to warm up. However, the bottom line is that regardless, you have the ability to calibrate any unit that doesn't pass the boiling water test. The unit can be calibrated by the user and the complete instructions are contained in the full owner's manual which you can download from The BBQ Guru web site. The instructions are easy to follow and work like a charm. On thing that might puzzle you is that when you calibrate the unit, you do so with the food probe. However, this also calibrates the pit probe, as you can see in our probe accuracy results above. You see, you aren't really calibrating the probe; you are calibrating the DigiQ II system unit to the probes. The entire procedure takes less than 30 minutes if you follow it to the letter, so it is worthwhile calibrating your unit when you get it, if necessary. But like we said earlier, allow the unit to warm up before you check the probes in boiling water for accuracy. Now let's take a look at the blower which feeds air to the fire in the cooker:
As you can see, the blower is sheathed in stainless steel. The nozzle is machined from solid aluminum and contains the integrated adjustable damper. Looking down the nozzle you can see how the damper can be used to restrict the airflow from the blower. You can use the damper wide open for quick starting a fire, or shut it part way to restrict airflow for lower-temperature cooking. This restricts not only the airflow produced by the blower, but also the natural draft that occurs when air flows through the blower while the blower is not forcing air into the cooker. (In other words, when the blower is off.) As for mounting, you can see in the photo above how the nozzle of the blower is pressed into the tube on the door mount. You can purchase blowers in 4, 10 and 25 CFM (cubic feet per minute) sizes. The blowers come with a four-foot wire as standard. A blower extension cord and a splitter cord that allows a single DigiQ II to control 2 blowers are avaible options. Door mounts are available for many popular cookers. Which blower should you get? Well, the 4 CFM blower will certainly handle cookers up to the size of a large Big Green Egg, for example. However, we think the 10 CFM blower is a good choice because a) it doesn't cost much more than the 4 CFM fan, and b) it can be throttled back with the damper for those times when you want less than the blower's full capacity. The 25 CFM blower is intended for use on larger metal cookers. The DigiQ II contains an audible alarm which will sound if the pit temperature deviates from the target temperature by more than the value you configure in the setup menu (for example if you were running out of fuel and the temperature were dropping). The alarm will also sound when the meat temperature reaches the target temperature you have set. The audible alarm can be silenced in these circumstances by pressing any of the buttons on the system unit. The beeper is also used to provide a chirp when you press the buttons as positive feedback. If you set the alarm intensity to 0, the chirp will not occur. |
You can support this website by shopping at The Naked Whiz Website Store and Amazon.com
|